One thing I’ve learnt from being a beauty addict
is that its never to late to learn to do things the right way. I’ve messed up
correctors, contour powders before, but continuously watching makeup tutorials
has taught me how to do them right. In the same vein, I felt that I have been
washing makeup brushes the wrong way. I always used Johnson & Johnsons Baby
Shampoo to clean makeup brushes & sponges….
… and I think that was wrong. Firstly because I
needed more quantity of it and secondly because I hate its smell. I didn’t hate
its smell earlier but once I started using it for my sponges, they started
smelling like the shampoo & it was awful. Thirdly, it took A LOT of effort
to get sponges spotlessly clean with that shampoo (hence large amounts were needed & so they smelled like it ).
When I purchased the original Beauty Blender
last year, I did not want to fool around with cleansers. It would really suck if
the pricey Beauty Blender also started smelling like that shampoo. I even
contemplated buying the ridiculously expensive blender cleanser….Thankfully a
little research on the internet brought me to an interesting cleanser option –
a soap. One makeup artist had said that she uses hotel soaps to clean beauty
blenders.
I decided
to just use what soap I had with at that moment, and that was a Dettol soap my dad had gotten for free when he purchased
something. And viola – clean, spotless Beauty Blender that smelled
lovely too. I tried the same for my makeup brushes and I was elated to
discover that the soap cleanses all of them thoroughly too. And I was saving so much more time this way too. After
that Dettol soap got over & I got a cheaper one – a Lifebuoy soap. And so far its been working great for me. I’d like
to add that just any soap won’t do, I used a
Dove soap and it was too gentle to clean out my tools completely.
The
benefit of using Dettol & Lifebuoy soaps is that you get the two step
process of cleaning & sanitizing your makeup tools in one product.
I have been using this technique since 5-6
months and I love it so much more than when I used shampoo. Also, my sister also
started cleaning her makeup brushes this way and she’s a fan of the process too
!
Here’s what I follow when I need to clean all
those dirty brushes & sponges.
Deep
cleaning a Beauty Blender or any makeup sponge and making it spotless :
1. Make sure the Beauty Blender/makeup sponge is
completely wet and expands to its full size.
2. Now gently rub it on the soap and make sure
you get sufficient soap all over it
3. You need to work in the soap now. Gently rub the Beauty
Blender on your hand (or between them). You will be able to notice the
foundation stains falling on to the sink whilst you do this.
4. Make sure you CLEAN out the soap completely.
This will require couple of rinses till you notice no soapy water coming from
the Beauty Blender.
That’s it. Four steps to a stain free Beauty
Blender. I know a lot of people complain about how hard it is to clean a Beauty
Blender and I faced the same problem when I was using baby shampoo. With the
soaps…not at all =) See the picture below for the proof. Also see this pic.
The
procedure to clean brushes is similar
1. Make sure the brush bristles are soaking wet.
DO NOT get water in the ferrule and especially not past it. If water gets into
the ferrule of your makeup brush, it will loosen the glue holding the hairs
together and your makeup brush will shed like crazy :/ The brush used here is the
Real Techniques Expert Face Brush.
2. Gently rub the brush hairs against the soap and make sure its got
sufficient soap.
Here I’d like to point out that it is very helpful to have a good soap case
for the soap. Not those fancy tray kinds, but this simple one which has holes so that water can pass through the soap
case instead of collecting in the soap case. Imagine your soap setting amongst
all the dirt deposited by your makeup tools !
3. Like we did with the Beauty Blender¸ work the
soap into the brush hairs. I always use my hand as the thing against which I gently rub
the brushes. But you can use those cleansing trays as well.
4. Wash the brush thoroughly; again, be careful
not to get water in the ferrule.
Drying
makeup tools with precaution:
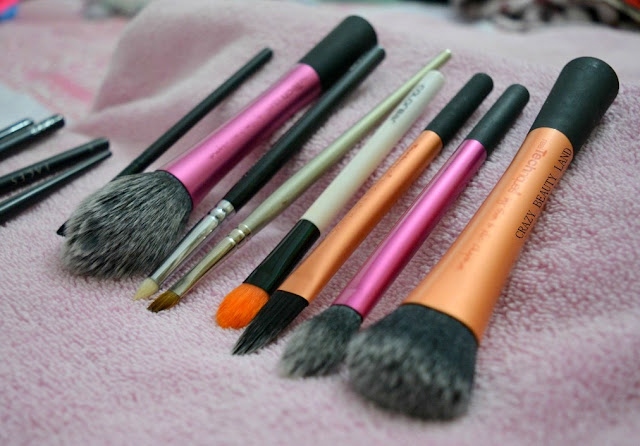
I prefer to put my wet, cleaned makeup brushes
on a thick towel. You’ll notice in the picture that the brushes are standing at
an angle, this ensures that the water from the bristles will flow down onto the
towel. Also, keep the bristle end of the brushes on the towel & not the
other way around, otherwise the water will flow into the ferrule of the brush.
Another big NO is using hair dryer to dry makeup
brushes. It is said that the heat from the hair dryer loosens the glue in the
ferrule of the makeup brushes.
Drying a Beauty Blender or any makeup sponge for
that matter also needs to be done with care. Make sure that they are not in an
air-tight place when wet, it can lead to the formation of fungus.
Once I’m done with washing them, I leave them on the same towel to dry. Forever
21 sponges dry within a day, the Beauty Blender takes 2-3 days to completely dry.


